
How to Disable WP-Cron (wp-cron.php) for Faster Performance
Cron jobs are used to schedule tasks at periodic fixed times, dates, or intervals on your WordPress site. Some examples of a WordPress cron job might involve scheduling a post to publish, checking for updates, or a backup plugin running on a predefined schedule.
In WordPress, this is handled by WP-Cron, which is used to simulate a system cron. However, depending on the amount of traffic to your site, using the built-in cron handler can actually start to impact your page load times. So today we’ll show you how to disable WP-Cron (wp-cron.php) and instead, use a system cron for faster performance.
Performance Issues with WP-Cron
We deal with a lot of high-traffic and demanding sites. Because of this, we’ve seen a lot of performance issues with the WordPress built-in Cron handler: WP-Cron. First off, it’s important to understand that WP-Cron is not a real cron job, it’s simply what WordPress has created to mimic what a system cron does.
WP-Cron does not run continuously. By default, the wp-cron.php fires on every page load, which on high-traffic sites can cause problems. If a site doesn’t have enough PHP workers, sometimes a request will come in, WordPress will spawn the cron, but the cron has to wait for the worker, and therefore just sits there.
The reverse scenario is also true. If a site doesn’t have a lot of traffic, schedules could be missed due to the fact that no one has loaded a page.
A better approach is to disable WP-Cron and use the system cron instead. This runs on a pre-defined schedule and is even recommended in the official Plugin handbook.
How to Disable WP-Cron
To disable WP-Cron, add the following to your wp-config.php file, just before the line that says “That’s all, stop editing! Happy blogging.”
Note: This disables it from running on page load, not when you call it directly via wp-cron.php.
define('DISABLE_WP_CRON', true);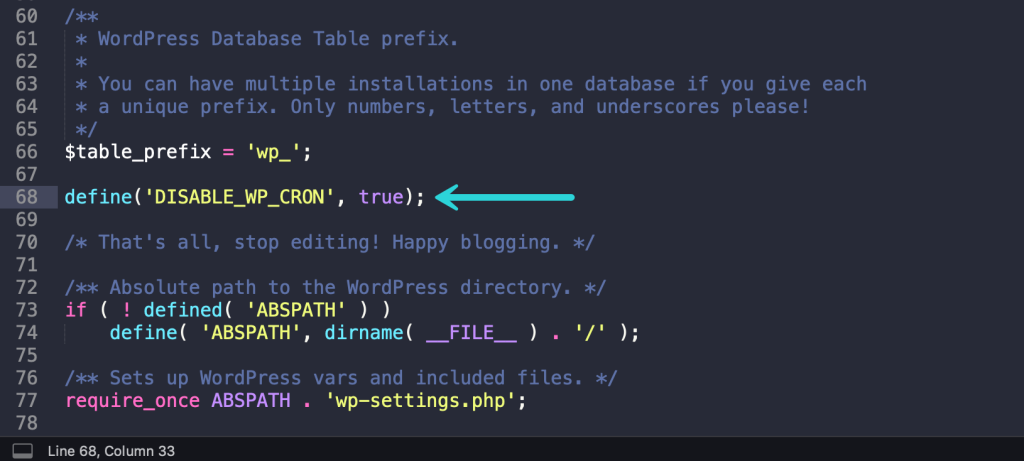
How to Schedule System Cron
You will then need to schedule wp-cron.php from your server.
If your site is multisite, there are some extra setup steps you’ll need to take so cron jobs will run for your subsites. Here are a couple of resources we can recommend for that:
Create Cron Job in cPanel
If you’re using a host with cPanel, you can also create a system cron from their control panel.
Note: Make sure you disable the default WP-Cron above first.
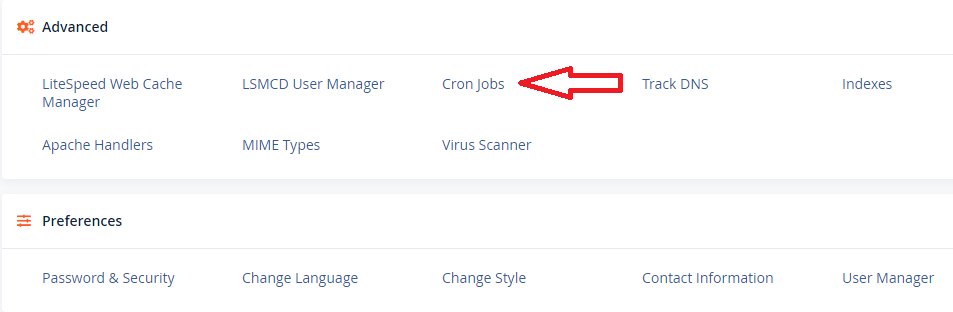
Step 1
Log in to cPanel. In the Advanced section, click on Cron Jobs.
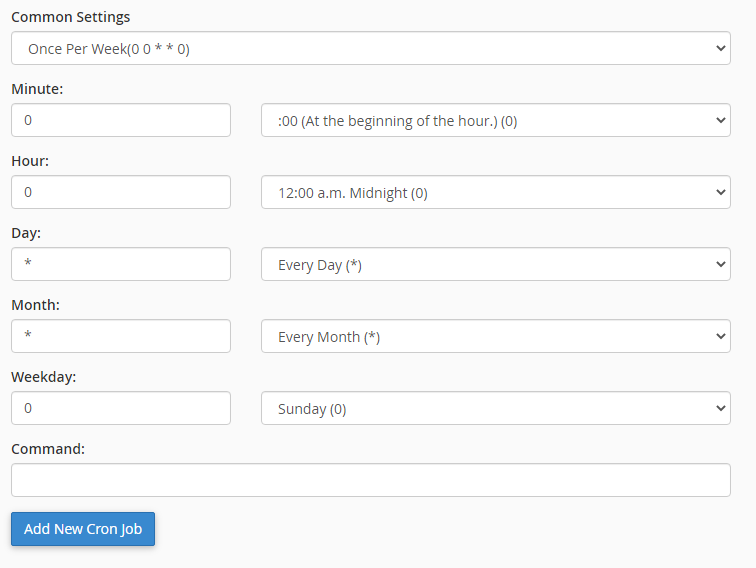
Step 2
Under the Add New Cron Job section, you can choose from a number of different pre-defined schedules, such as twice per hour or once per week. Your hosting provider most likely has a limit on how often they allow cron jobs to be run. Twice per hour is a common setting for shared hosts.
Step 3
Add the following command. Replace https://domain.com with your domain name. This command might vary slightly based on how your hosting is configured. Then click on “Add New Cron Job.”
wget -q -O - https://domain.com/wp-cron.php?doing_wp_cron >/dev/null 2>&1

The >/dev/null 2>&1 part of the command above disables email notifications.
Choose the most suitable website package for your business and make your first move to developing your online presence now.